← Back to recipes

January 6, 2025

Smoked Pork Shoulder for Pulled Pork

Tag: barbecue Tag: pork Tag: low-and-slow Tag: meal-prep Tag: freezer Tag: project-cook
Prep
30m
Cook
12-14h
Total
14h30m
Hero image for Smoked Pork Shoulder for Pulled Pork

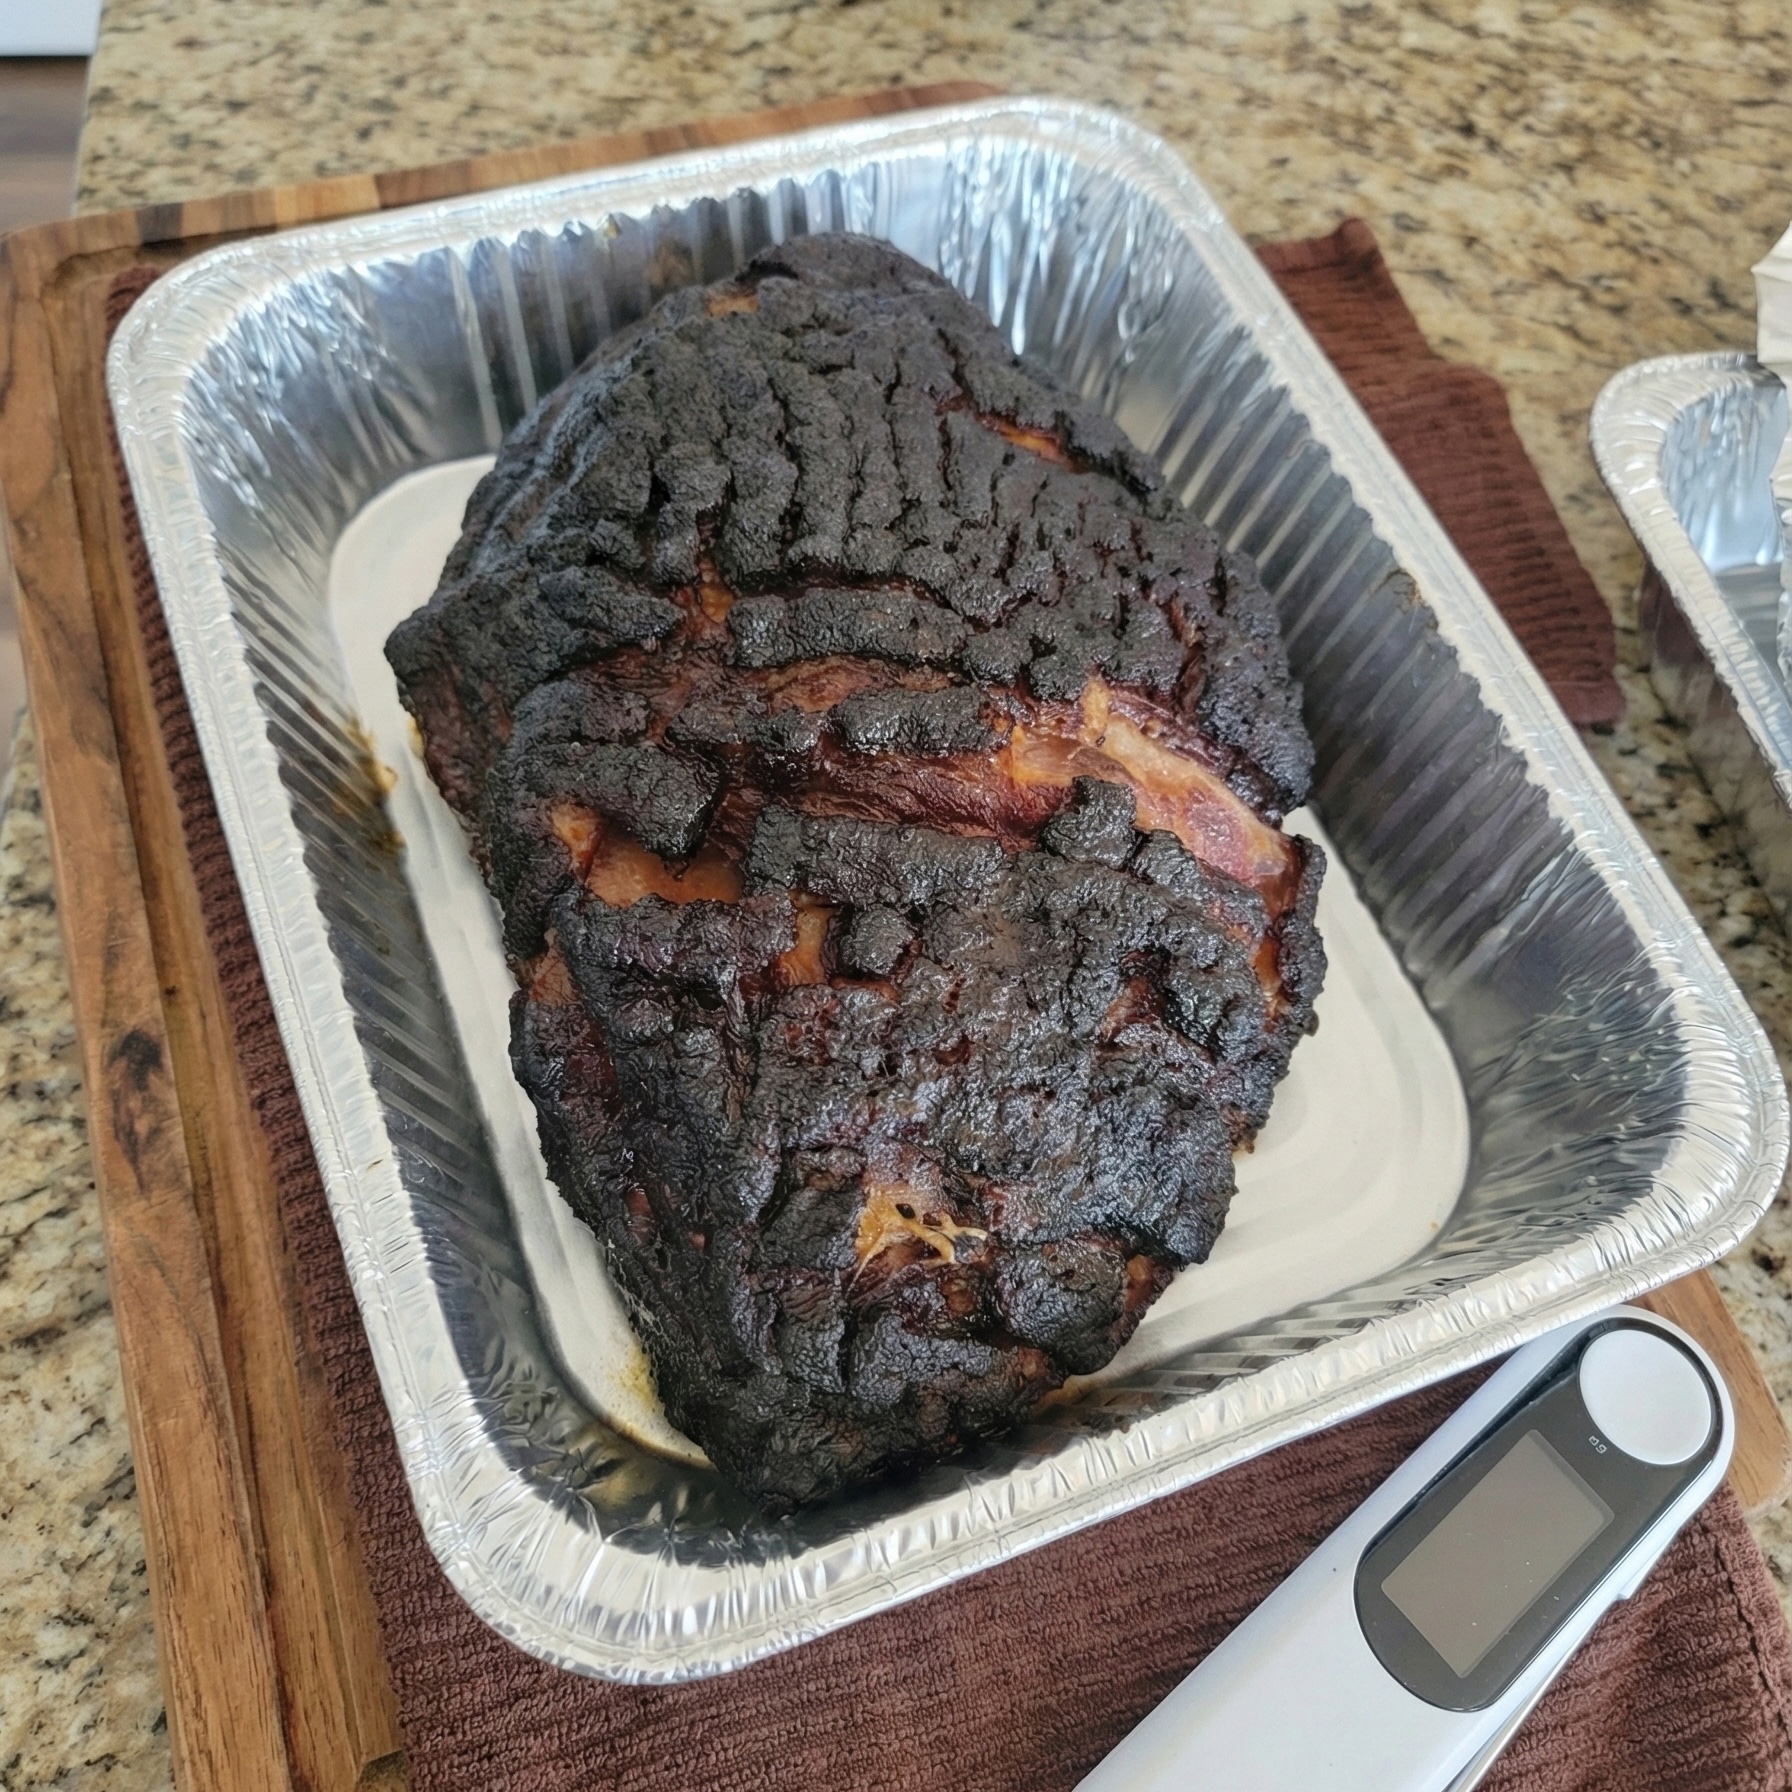
This isn’t just “pulled pork”—it’s an exercise in texture management. By obsessing over the Bark-to-Meat Ratio and using a strategic “flip” during the cook, we maximize the crunchy, sugary exterior while keeping the interior luxuriously moist.

This method prioritizes a high-quality, sugar-forward rub and a “zero-sweat” application to ensure the bark sticks. The final product is designed to be eaten naked, with the natural jus provided by the pork itself, or used as the foundation for our Pulled Pork Nachos.

The “Money Muscle”

When selecting your roast, look for the Coppa (or money muscle) at the top of the shoulder. This highly marbled section is the prize of the cook.

The Zero-Addition Protocol

We don’t sauce this pork. By capturing the drippings in a foil tray during the second half of the cook and re-incorporating them at the pull, we create a product that is intensely flavorful on its own. Save the sauce for the sandwich bun.

From prep to plate

Raw Material Selection & Prep

Mise en place (Ingredients)

  • Bone-in Pork Shoulder (Boston Butt), approx 8-10 lbs
  • Yellow Mustard (Binder)
  • Sugar-forward BBQ Rub (e.g., Cimarron Doc’s or Wicked Que)

Steps

  1. Cap trimmed

    Trim the fat cap to a standard 1/4-inch thickness.

    Look for the "Coppa" muscle as a quality indicator. A consistent fat cap ensures even rendering.

  2. Cross-hatch cut

    Score the fat cap into a cross-hatch pattern (1/4" to 1/2" squares).

    This creates "bite-sized" flavor morsels of bark and increases surface area for the rub.

  3. Binder applied

    Apply a thin binder of yellow mustard, working it into the cross-hatch crevices.

  4. Rubbed

    Apply a heavy dusting of the rub. Coverage should be total, obscuring the meat and mustard.

    The rub must contain brown sugar to ensure a mahogany color and balance the smoke.

  5. Ready to load

    "Zero-Sweat Protocol": Move immediately to the smoker.

    Do not disturb!

    Do not let the meat "sweat" or sit. Static adhesion prevents the rub from sloughing off during the cook.

Thermal & Surface Management (The Cook)

Mise en place (Ingredients)

  • Spritz Liquid (ACV, Apple Juice, or Dr Pepper)

Steps

  1. Smoker at 180°F

    Preheat smoker to 180°F (The Low Start).

    Use a high-quality pellet blend (Recteq Ultimate + Apple Wood). Start low to maximize smoke absorption.

  2. Loaded

    Load the pork shoulder Fat-Cap UP.

    This prevents the delicate fat cap from fusing to the grate.

  3. Temp to 225°F

    When the bark has set (normally at 4 hours), Increase the temperature

    Assessment Time

    Bark Builder

    If the surface is still wet or pale, hold at 180°F for another 45 minutes to let the smoke do its work before raising the temp.

    I started this morning and want this tonight

    If the bark is starting to dry and darken, crank it up to 300°F to push the stall.

    This is gonna cook overnight.

    Push the smoker to 200 overnight, then 250 when you wake up.

  4. Spritzed

    Spritz lightly with clear liquid (ACV/Apple Juice) during the early stage if dry spots appear.

    Later in the cook, switch to "particulate" liquids (cloudy juices) to promote caramelization.

The Tray Transition

Mise en place (Ingredients)

  • Heavy-duty Foil

Steps

  1. Bark set

    Verify bark set and fat rendering with the "pluck test".

    The bark should be firm and not smear when touched.

  2. Trayed & Flipped

    Transfer the shoulder to a smooth-bottom foil tray, FLIP to Fat-Cap DOWN.

    This exposes the meat side to the smoker's heat facing up, creating a dryer environment for superior texture and caramelization.

  3. No liquid added

    Do NOT add supplemental liquid to the tray.

    We want to avoid creating a "Juice Jacuzzi" that steams off the bark. Let the pork's own juices do the work.

  4. Cook complete

    Continue cooking until internal temp is >200°F and the bone wiggles freely.

    CAUTION - Bone will be scalding hot!

    Use tongs to test the bone—if it twists loose with zero resistance, it's done.

Post-Cook Protocol (Rest & Pull)

Mise en place (Ingredients)

  • Cotton Glove Liners
  • Nitrile Gloves

Steps

  1. Rested

    Cover the tray with a vented foil lid and rest for at least 30 minutes.

    Venting prevents steam buildup that could soften the bark.

  2. Station prepped

    Setup the "Hand-Pull" station: Meat Boat (tray), Refuse Bowl, and Collection Bowl.

  3. Pulled

    Pull the meat by hand, separating strands and aggressively removing any undesirable content (gelatinous fat, connective tissue, membranes).

    "Cut" long strands by pinching. Ensure every bite has a mix of meat and bark. Only clean meat goes in the bowl.

  4. Juices incorporated

    "The Zero-Addition Protocol": Pour all tray drippings back into the meat.

    Do not add extra BBQ sauce or seasoning. The rendered fat and jus are flavor gold.

Storage & Preservation

Mise en place (Ingredients)

  • Vacuum Sealer Bags

Steps

  1. Portioned

    Portion meat into vacuum bags, spreading it thin.

    Thin packs freeze faster and thaw more evenly.

  2. Sealed

    Vacuum seal using manual pulse control.

    Watch the liquid line!

    Stop before you extract the precious juices from the meat matrix.

See More

Kitchen Notes

Related Recipes